Print Help
Preparing Your File for Print
Please make sure your print file is set up correctly before sending over to us.
A. For a single-page artwork

Page Layout Specifications
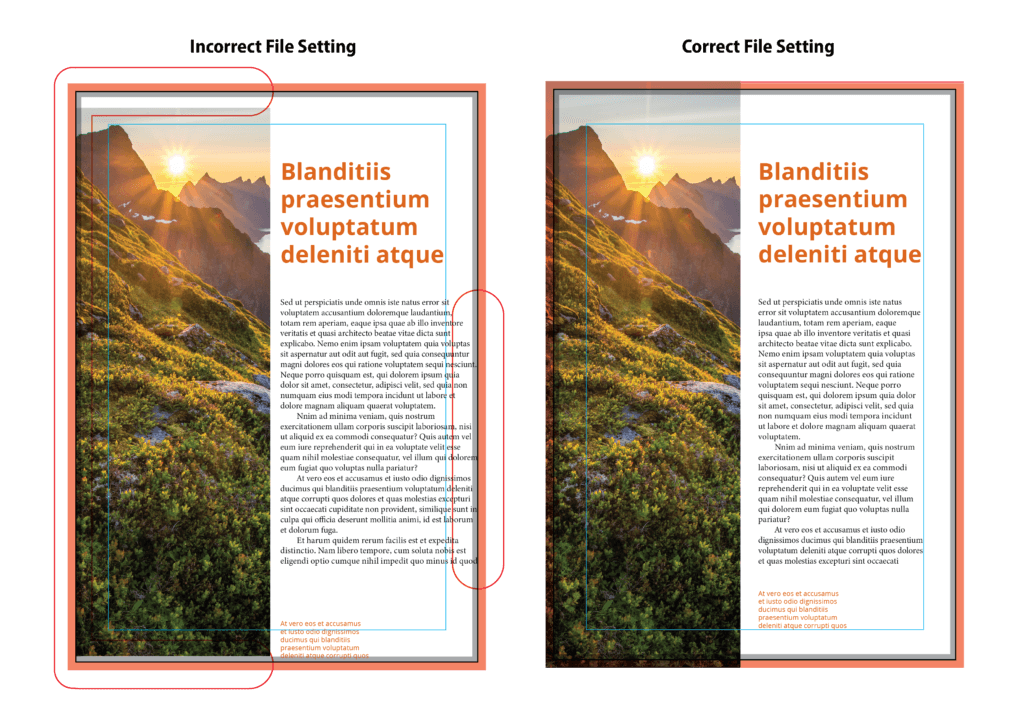
Set up the size of each page to include the Bleed Area (3mm all around).
1. BLEED AREA
The Bleed Area refers to the outer margin of each page that will be cropped off
when the book is trimmed to its final size. This area enables you to insert
backgrounds and images that run through into this margin allowing for a nicely trimmed finishing.
For an A4 book (210 x 297mm), set up the page to 216 x 303mm allowing for a
3mm Bleed Area all round.
This is indicated by the area in red. Do not place any text or important part of an
image element in this area. If you require an image to stretch to the edge of the
trimmed page, you must stretch the image past the Trim Line and into this area.
2. TRIM SIZE
This refers to the Artwork size after bleed area is cut away
3. DANGER ZONE
The Danger Zone is the 2mm margin from the trim area. Any text or images
within this area risks being trimmed off. While you may have images stretched
into this area, keep ALL text outside this area.
4. THE SAFE AREA
The Safe Area is within the blue line. This can be around 20mm from the trim size.
Your images and text within this area are safe and will remain as part of the book.
B. For artwork that stretches across 2 adjoining pages

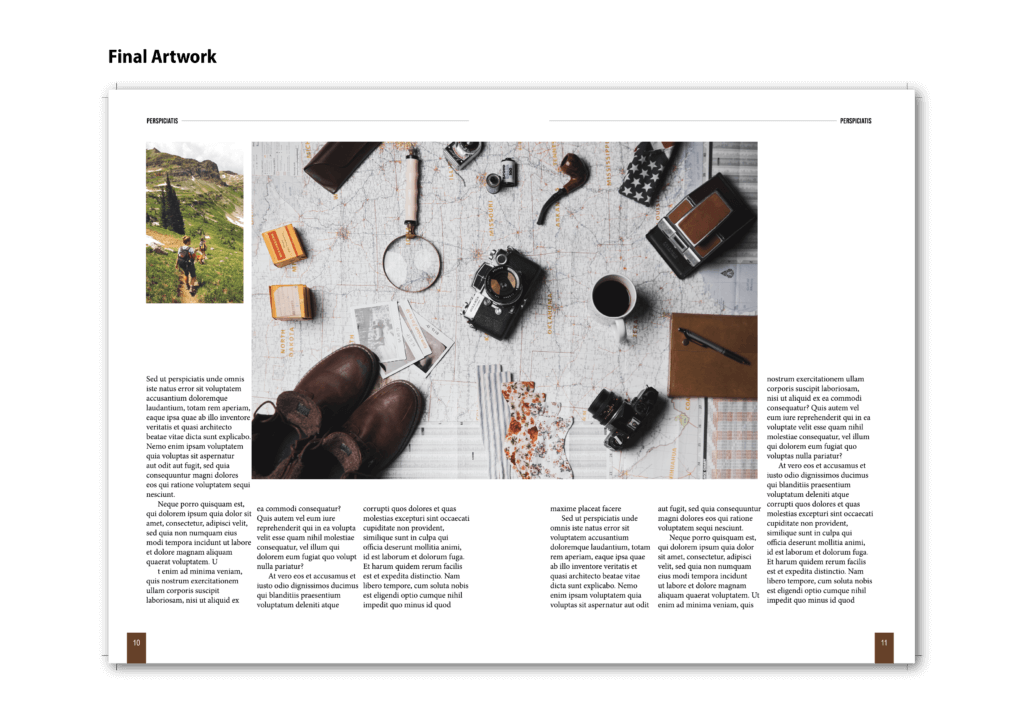
Page Layout Specifications
For pages where you intend to have a Spread i.e. images and text that stretch across 2 side-by-side-page, overlap the Bleed Area by duplicating the image that is shared across the 2 pages.
IN SUMMARY
1. Upload your files in PDF format.
2. When exporting your work from Word or other editing software into PDF format, we recommend exporting using PDF/X-4 option.
3. Save all photos and images with 300dpi resolution.
4. Save Black and white images in Grayscale mode.
5. Embed all fonts and images before exporting file as PDF.
6. Artwork size should match paper size – artwork size to include bleed allowance so that the final cut size is according to the required book size, e.g. for A4 size 210x297mm, artwork size should be 216x303mm to allow trimming of 5mm at each edge.
7. Save as PDF in single page format. Do not save pages in spread format.
8. Consistent page orientation. Do not mix landscape & portrait pages.
C. Preparing bleed when using Canva
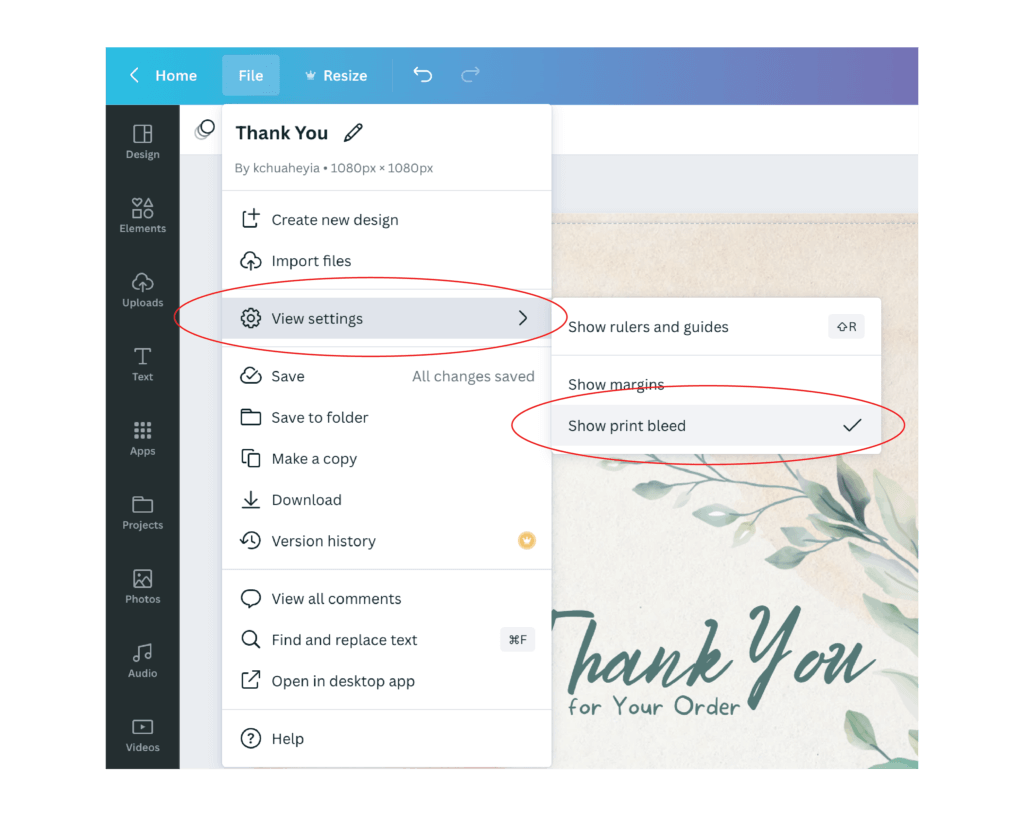

How do I set up bleed in Canva?
1. Create or select existing template.
2. Go to File – View settings – Show print bleed.
3. A border of dotted lines will appear close to the edges of your design. This is
the bleed margin and cannot be adjusted.
4. If there are white areas around the edges of your artwork, resize or stretch the
background to fill them. Adjust design elements away from the edges to avoid
being cut off or you can adjust
5. To download file, click on Share – Download – PDF Print
tick Crop with bleed – Download
6. PDF with Bleed and Cropmarks